Search This Blog

Powered By Blogger

Thursday, January 13, 2011

INSTALL MICROSOFT SECURITY ESSENTIALS (MSE)

Microsoft Security Essentials (MSE) is a no-cost security software for your PC from Microsoft. It can provide protection against all kinds of malware including viruses, trojans, worms and spyware. Unlike other free software, this also provides real-time protection. One can get an idea of what to expect from Microsoft Security Essentials from our earlier article Microsoft Security Essentials – What you need to know?.

Download
Microsoft Security Essentials is available in many languages for Genuine Windows XP 32-bit, Windows Vista/WIN7 32-bit and for Windows Vista/WIN7 64-bit.
Installation
 Microsoft Security Essentials   How to download, Install and Update
Double click the downloaded setup file to start the installation.
microsoft security essentials download install update 01 590x365 Microsoft Security Essentials   How to download, Install and Update
Click Next to continue.
microsoft security essentials download install update 02 590x365 Microsoft Security Essentials   How to download, Install and Update
Read the license agreement and then click I accept to accept the MSE license agreement. You can also read the license agreement on the web at MICROSOFT SOFTWARE LICENSE TERMS MICROSOFT SECURITY ESSENTIALS.
microsoft security essentials download install update 03 590x365 Microsoft Security Essentials   How to download, Install and Update
Microsoft Security Essentials needs to validate your copy of Windows prior to installation. Click Validate to start the validation process.
microsoft security essentials download install update 04 590x371 Microsoft Security Essentials   How to download, Install and Update
Once the validation is complete, click Install to continue with the installation.
microsoft security essentials download install update 05 590x365 Microsoft Security Essentials   How to download, Install and Updatemicrosoft security essentials download install update 06 590x365 Microsoft Security Essentials   How to download, Install and Update
The following screen is displayed once the installation is complete:
microsoft security essentials download install update 07 590x365 Microsoft Security Essentials   How to download, Install and Update
Note that the option to download the latest updates and start a scan for potential threats is pre-checked. Click Finish.
microsoft security essentials download install update 08 590x458 Microsoft Security Essentials   How to download, Install and Updatemicrosoft security essentials download install update 09 590x458 Microsoft Security Essentials   How to download, Install and Update
MSE will immediately search for and download the latest virus and spyware definitions and will commence a quick scan of the PC.
To upgrade MSE
Once the initial update and quick scan are completed, its time to look for any upgrades available for the MSE software itself.
microsoft security essentials download install update 12 590x349 Microsoft Security Essentials   How to download, Install and Updatemicrosoft security essentials download install update 10 590x365 Microsoft Security Essentials   How to download, Install and Update
Expand “Additional help options” and click on Upgrade Microsoft Security Essentials. If an upgrade is available, let MSE download and install it.

WINDOWS XP SERVICE PACK 3

Windows XP Service Pack 3 (SP3) is an important update that includes previously released security, performance, and stability updates for Windows XP.

How to get SP3

The recommended (and easiest) way to get SP3 is to turn on Automatic Updates, which can automatically download SP3 when it's available for your computer. You just need a few clicks to begin the installation and the rest of the process is automatic. If Automatic Updates isn't turned on, you can install SP3 by using Windows Update at the Windowswebsite.
In order to install SP3, you must first have Windows XP Service Pack 1a (SP1a) or Service Pack 2 (SP2) installed. These are also available when you have Automatic Updates turned on. For more information about these and other Windows service packs, go to the Service Pack Center.

To learn if Windows XP SP3 is already installed

  • Click Start, right-click My Computer, and then click Properties.
    If Service Pack 3 is listed in the System section, SP3 is already installed on your computer and you don't need to follow the instructions below.
    Before you install SP3, we recommend you do the following:
    • Log on to your computer using an administrator account, make sure all other users are logged off of the computer, and close all open programs.
    • Back up your important files to an external location, such as an external hard disk, DVD or CD, or USB flash drive. For more information, see "Backing up files and folders" in Help and Support Center.
    • If you're using a laptop computer, connect it to an AC electrical outlet and don't unplug or restart the computer during installation.
    • If you have a third-party wireless network adapter, make sure that the device is supported by Windows XP SP3. For more information, go to the device manufacturer's website.
    • If your computer is running Windows XP Professional, we recommend that you create an Automated System Recovery (ASR) set. This can help repair your system if the installation fails. For more information, see "To create an Automated System Recovery set using Backup" in Help and Support Center. (ASR isn't available forWindows XP Home Edition.)
    • Some antivirus software might prevent SP3 from installing, or might slow down the installation. You can try temporarily disabling your antivirus software. If you do so, be sure that you're aware of the risks involved, and be sure to enable it after the service pack is installed.
    • Make sure you have enough free disk space to install SP3 (even though much of that space will be reclaimed after the installation). If you need to create free disk space, see "Using Disk Cleanup" in Help and Support Center.
      Amount of free disk space required to install SP3 (estimated):
      Installation method
      Approximate free disk space required
      Windows Update
      1,840 MB
      Downloading SP3 from the Microsoftwebsite
      1,500 MB
      Installing SP3 from a CD
      1,765 MB

    If your computer is set to automatically install updates, you'll be prompted by Automatic Updates to install SP3. Follow the instructions on the screen. If you aren't prompted to install SP3, follow these steps:

    To install SP3 using Windows Update

    1. Click Start, click All Programs, and then click Windows Update.
    2. Click Express (Recommended).
    3. If your computer is up to date, Windows XP SP3 will be one of the updates that is automatically selected. Click Install Updates. If your computer isn't up to date,Windows Update will offer some other updates that you have to install first. Install those, and then repeat steps 1 and 2 to obtain Windows XP SP3.
    4. Follow the instructions that appear on your screen.
    5. After the installation is complete, click Finish to restart your computer.
    6. If you disabled your antivirus software, enable it again.

    If you have problems obtaining the service pack from Windows Update, you can download SP3 as a standalone installation package from the Microsoft Download Center website, and then install SP3 manually. The installation package is intended for IT professionals and developers, but you can still download and install this file.
    You can also order a CD from Microsoft containing SP3. For more information, go to the Microsoft website.

    To manually install SP3 using the standalone installation package or a CD

    1. Do one of the following:
      • If you downloaded SP3 from the website, to install it immediately, click Openor Run and follow the instructions on your screen. To install the program later, click Save and download the installation file to your computer. When you're ready to install the service pack, double-click the file.
      • If you're installing SP3 from the Service Pack 3 CD, insert the disc into your computer with your current version of Windows XP running, and theSoftware Update Installation Wizard should automatically appear. If this wizard doesn't appear, click Start, double-click My Computer, right-click your CD or DVD drive, and then click AutoPlay.
    2. On the Windows XP Service Pack 3 page, click Next.
    3. Follow the instructions that appear on your screen.
    4. After the installation is complete, click Finish to restart your computer.
    5. If you disabled your antivirus software, enable it again.

    If you installed SP3 yourself, you can uninstall it. However, if your computer came with SP3 already installed, it can't be uninstalled.

    To uninstall SP3

    1. Click Start, and then click Control Panel.
    2. Click Add or Remove Programs, click Windows XP Service Pack 3, and then clickRemove.
    3. Follow the instructions that appear on your screen.
    Warning

    Warning

    If you choose to uninstall SP3, a dialog box displays a list of the programs that you installed after you installed SP3. If you continue, these programs might not work correctly.

    Make sure you're taking advantage of all the ways that Windows can help keep your computer as secure and safe as possible:
    • Install an antivirus program. Antivirus programs scan for viruses trying to get into your e‑mail, operating system, or files, and can help protect your computer. To find an antivirus program, go to the Windows Security software providerswebpage on the Microsoft website.
    • Don't open e‑mail attachments. Many viruses are attached to e‑mail messages and will spread as soon as you open the e‑mail attachment. It's best not to open any attachment unless it's something you're expecting. Microsoft Outlook andWindows Mail can help block potentially dangerous attachments.
    • Use a firewall.‌ Windows Firewall or any other firewall program can help alert you to security threats. It can block viruses, worms, and hackers from attempting to download potentially harmful programs onto your computer.
    • Use the latest version of Internet Explorer. Internet Explorer 8 contains security and privacy improvements, such as SmartScreen Filter and InPrivate Browsing, which can help protect your computer so you can browse the web with more confidence. For more information, go to the Internet Explorer webpage on theWindows website.

Wednesday, January 12, 2011

HOW TO FORMAT AND REINSTALL WINDOWS 7

STEP INSTALLATION

how to format and install Windows 7Windows 7 is far better than previous windows versions (XP and Vista). The install process is plain simple and easy to follow. Big Bravo! for Microsoft for this. Now, just follow these steps and you will install windows 7 in no time
You can Install Windows 7 via DVD Disk you’ve purchased or with bootable USB.
This post explains installing windows 7 with dvd disk.
- 31 steps total, every step is screen-captured

First, insert your Windows 7 Boot Disk into your dvd drive and reboot your PC
While the PC is rebooting, you will be prompted ” Press any key to boot from CD…” Just press any key here
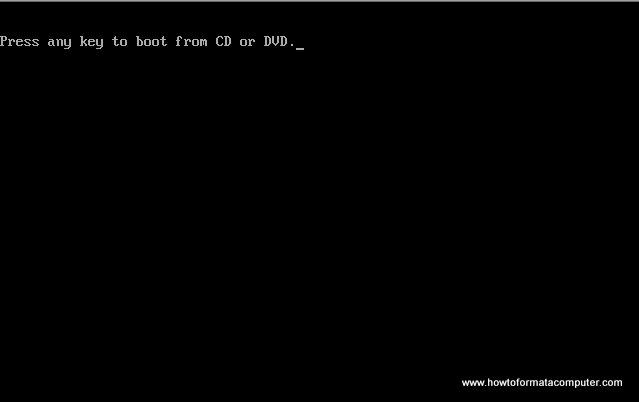
Install Windows 7 - Press any key
After you press a key, windows will load installation files.
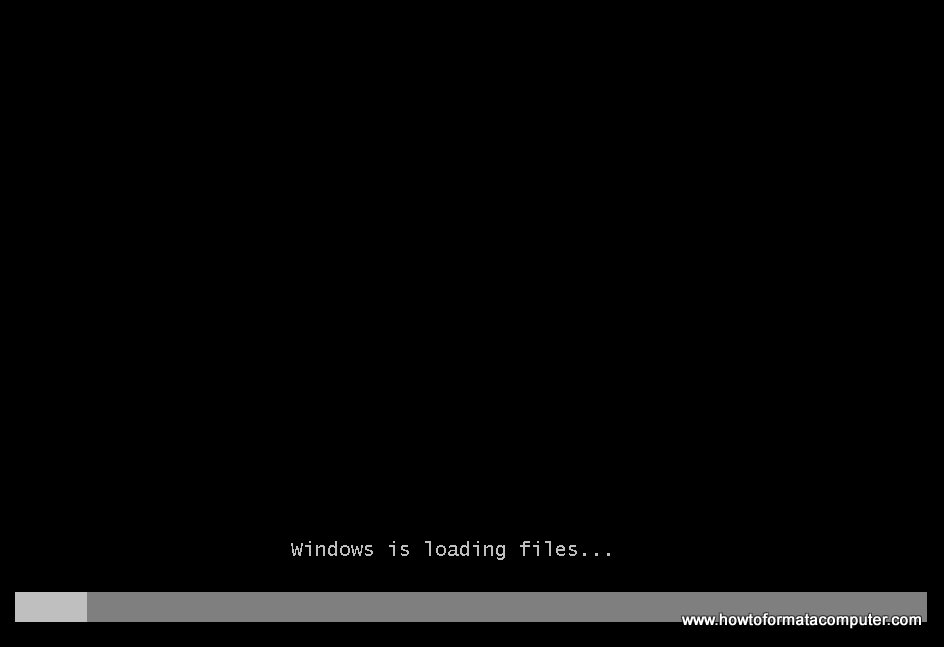
Install Windows 7 - Windows is loading files
Windows 7 setup will start
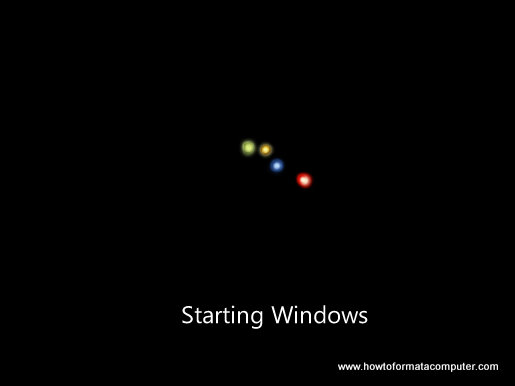
Install Windows 7 - Starting Windows Setup
Select your language, time and currency format and keyboard input (US)
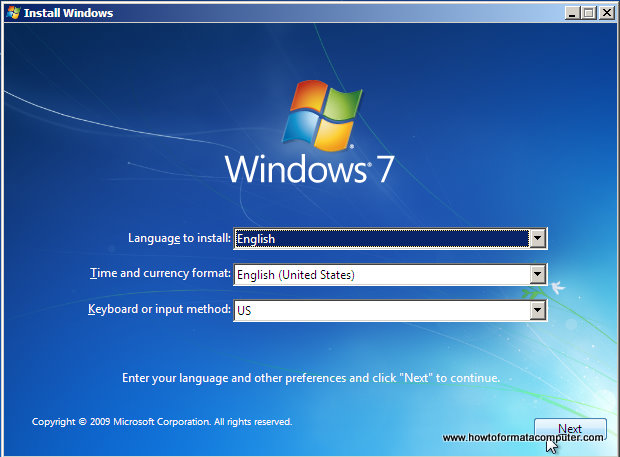
Install Windows 7 - First Setup Screen, input language, time and currency format and keyboard input method
Click Install Now to proceed
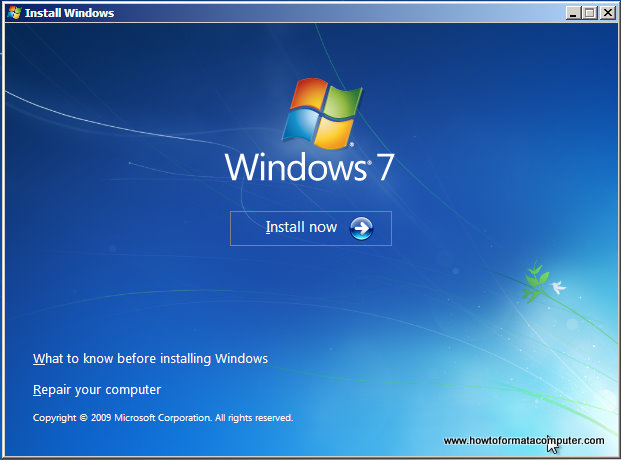
Install Windows 7 - Install Now Screen
Setup will load for a min or two
Install Windows 7 - Setup is starting
If you do, select I accept the license terms and click Next
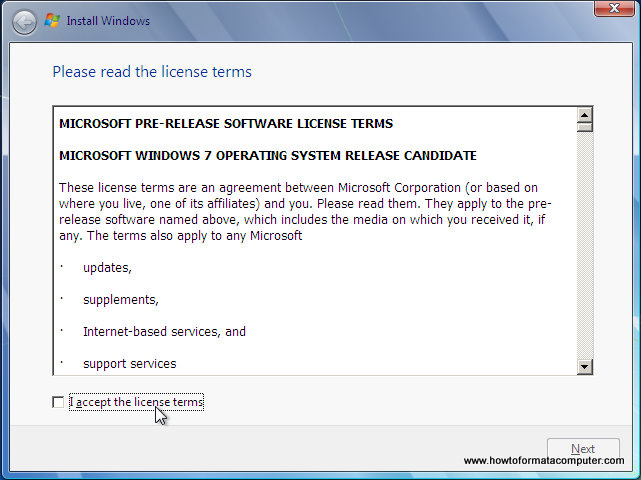
Install Windows 7 - License Terms
If you are upgrading from Windows Vista select Upgrade, if you had Windows XP you have to select Custom (Advanced). Upgrade from Windows XP to Windows 7 is not available. Click Custom (Advanced)
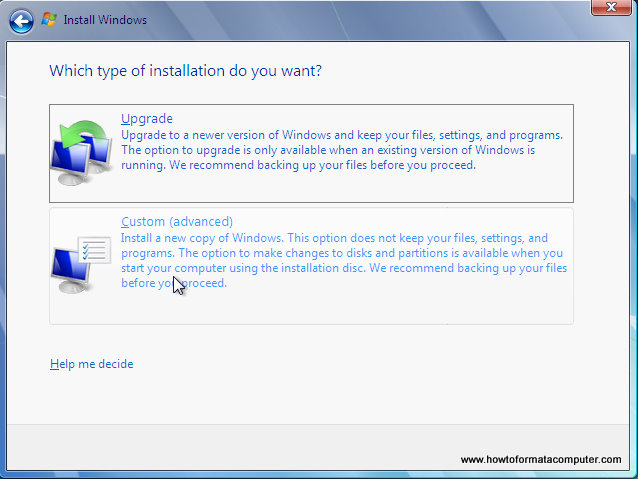
Install Windows 7 - Custom Install
Select the Partition where you want to install Windows 7 and click Next. You will need at least 5716mb free space.
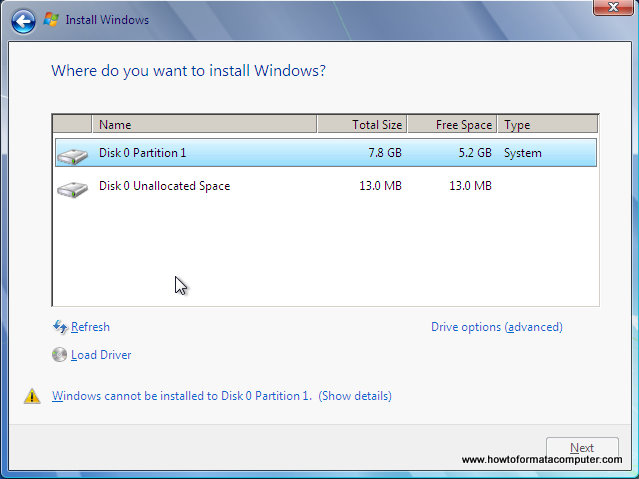
Install Windows 7 - Where do you want to install windows
If you don’t have enough free space to Install Windows 7, you will receive the following warning
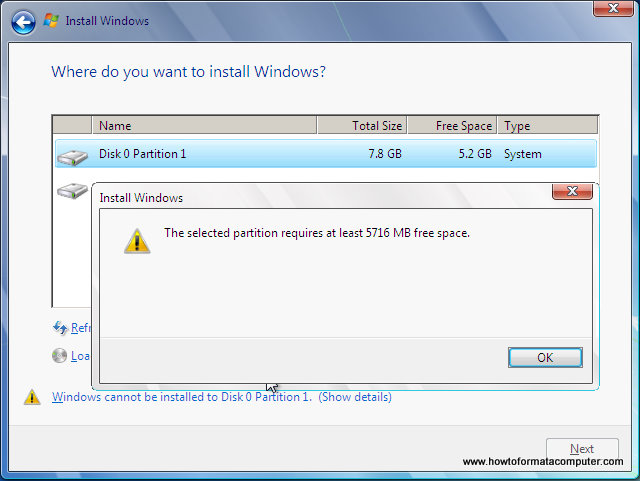
Install Windows 7 - Not enough disk space warning message will appear
If that’s the case, you will need to format the partition where you previously had Operating System installed. WARNING: Formatting a partition will erase all existing data on the partition, proceed only if you have backed up all your files!
If you want to format the partition, go to Drive options
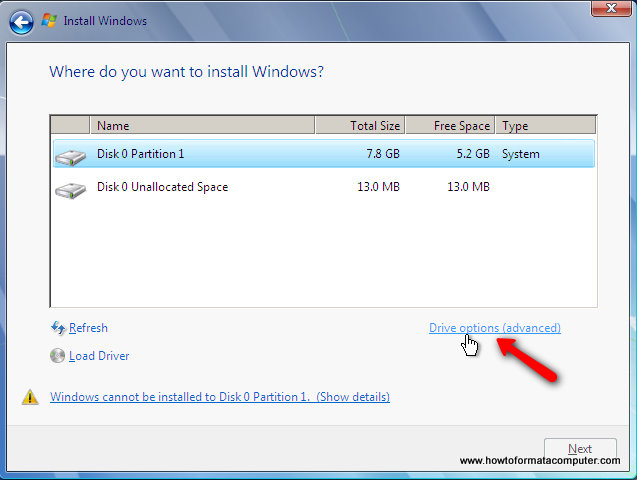
Install Windows 7 - Drive Options
and format the partition where you want to install windows 7. Again, do this only if you have backed up your documents/files!
click format and then yes
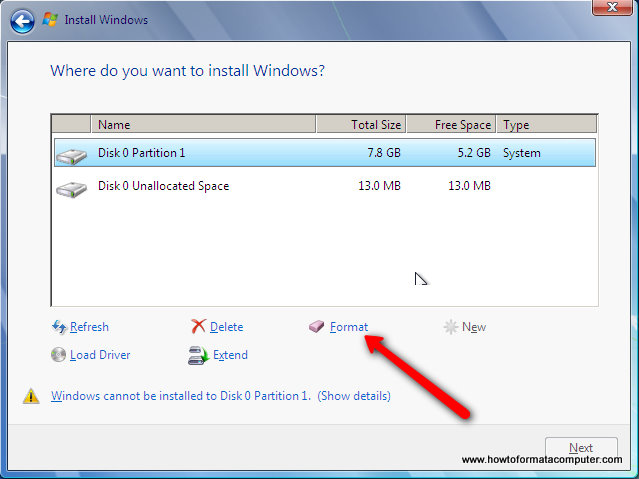
Install Windows 7 - Format Windows 7 Install Partition
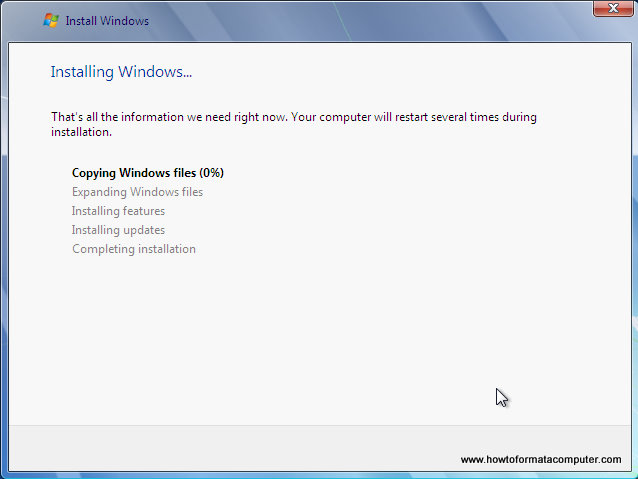
After you press Next, Windows 7 Installation will begin. Approximately takes about 30 min to 1 hour to finish, depending on your computer speed.
Install Windows 7 - Setup running
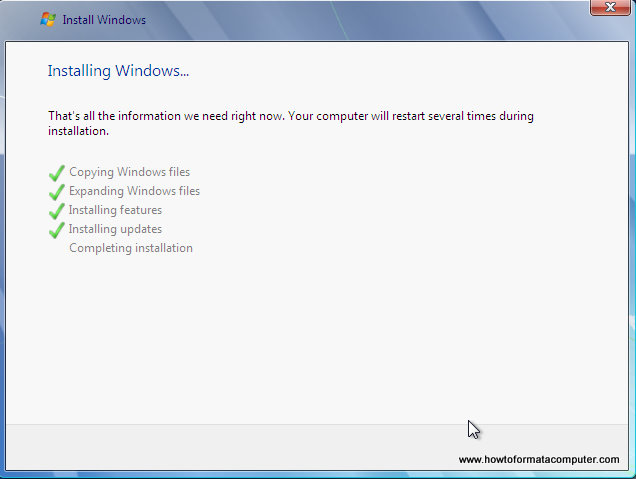
After half an hour, setup is complete and windows 7 installation is almost finished. Few more minutes
Install Windows 7 - Setup Complete
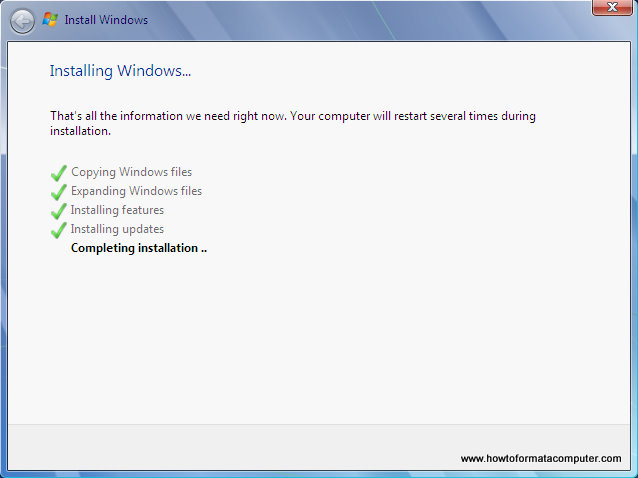
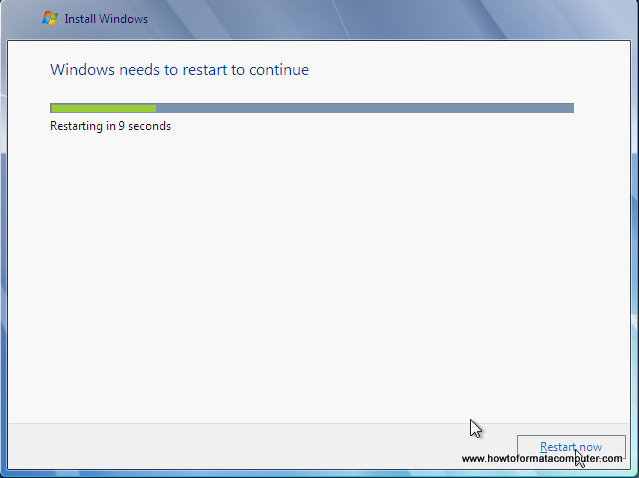
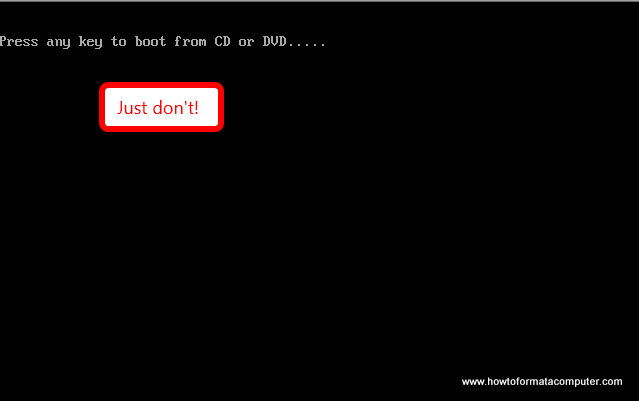
Now your computer will reboot, since the Windows 7 DVD boot disk is still in the drive, the message press any key to boot from DVD will appear. We already did that, so this time DO NOT press anything. Just wait 5 sec and your PC will continue booting and finish installing your operating system.
Install Windows 7 - Setup Restarts
Install Windows 7 - Dont press anything this time
Windows will continue booting and installing, almost there!
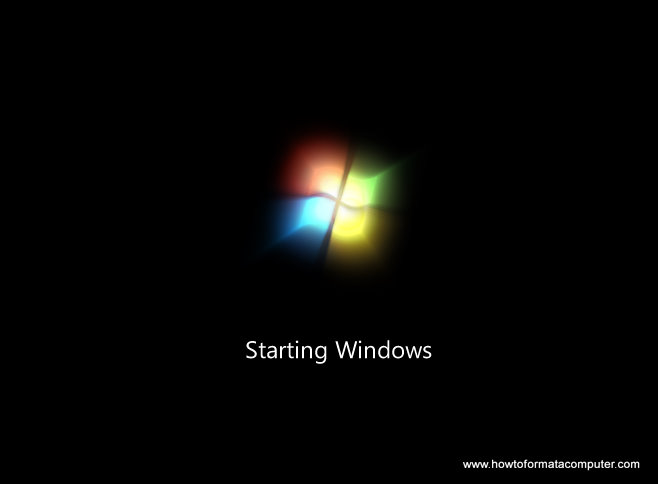
Install Windows 7 - Windows starts to load
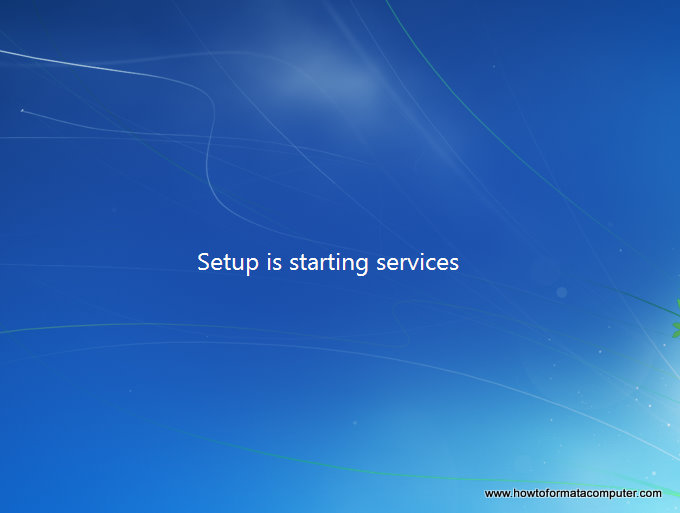
Install Windows 7 - and loads and loads
Install Windows 7 - loading...
Install Windows 7 - Completing Installation
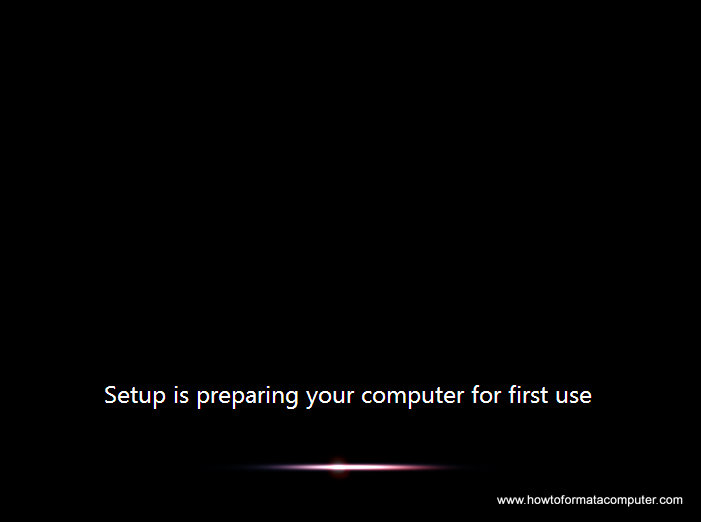
Install Windows 7 - Setup is preparing your computer for first use
Finally!
Insert your name (this will be your windows username)
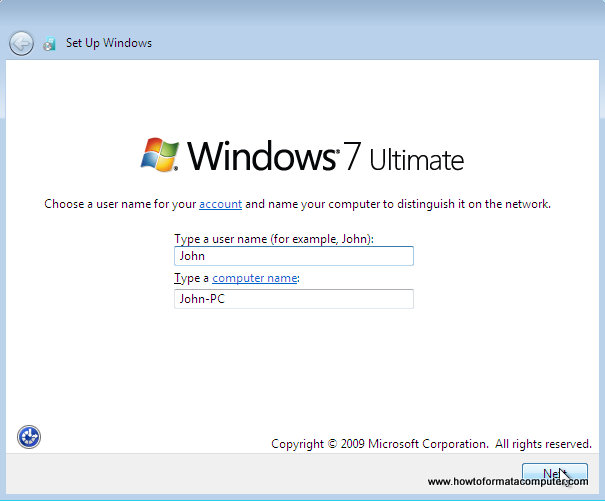
Install Windows 7 - Type a username
If you want to, insert password for your computer. ( Hey….you won’t forget it, right? :) )
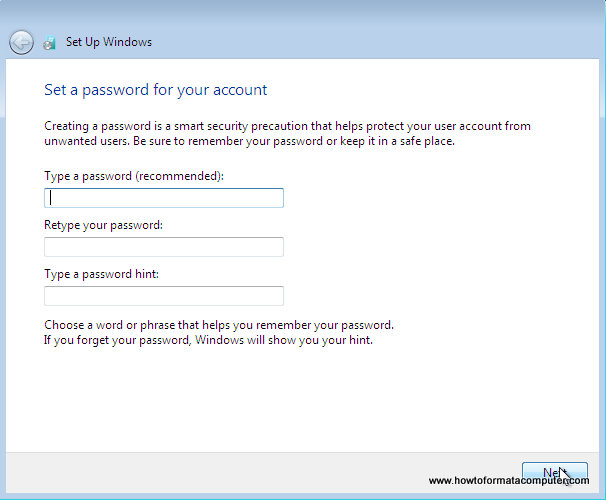
Install Windows 7 - Type a password
Insert your Windows 7 product key and press Next
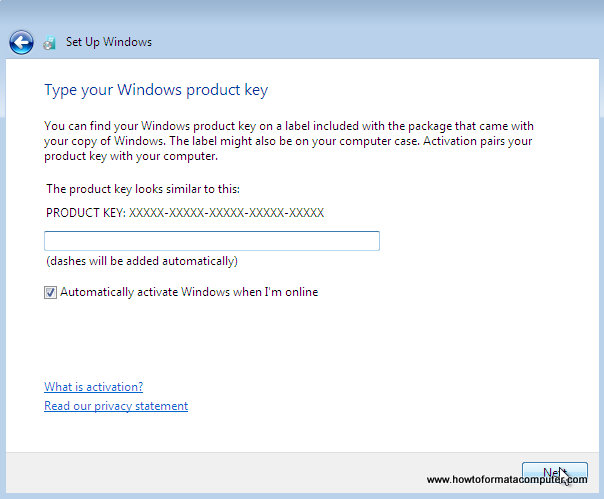
Install Windows 7 - Type your windows product key
Do you want Microsoft Updates for your new operating system? It is highly recommend you know…! Select use recommended settings
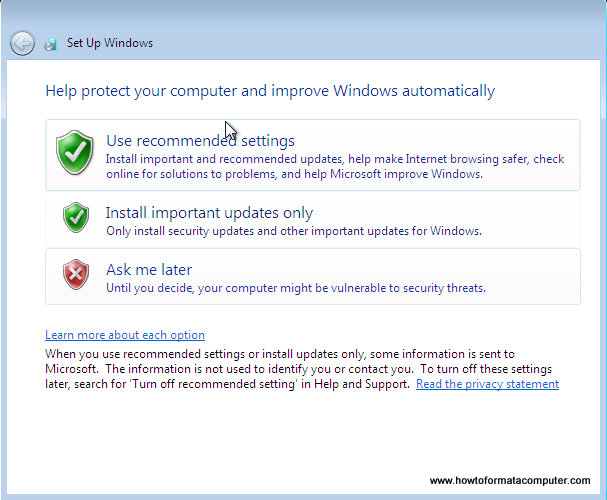
Install Windows 7 - Use Recommended Settings
It’s time for Time zone, select yours from the drop down menu
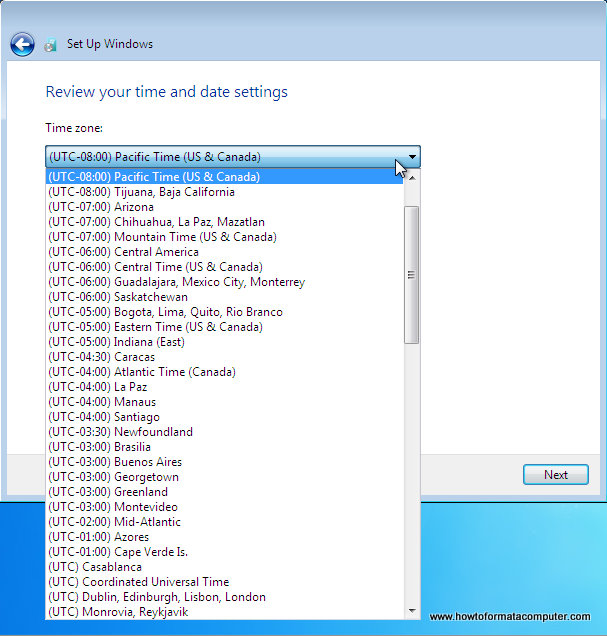
Install Windows 7 - Review your time and date settings
Depending on your location, select the appropriate network location.
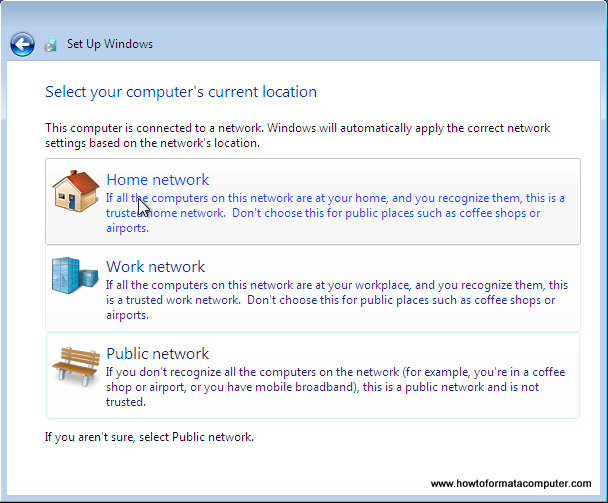
Install Windows 7 - Computer location select network
If you have more than 1 computer, type homegroup password for sharing files. Make sure to remember it
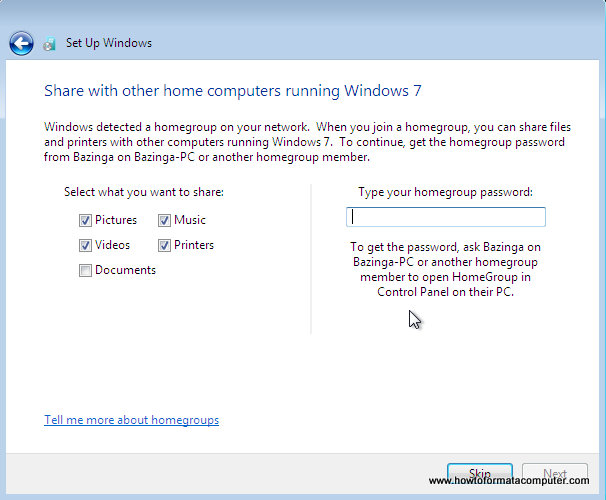
Install Windows 7 - Type homegroup password
Windows is finalizing your settings
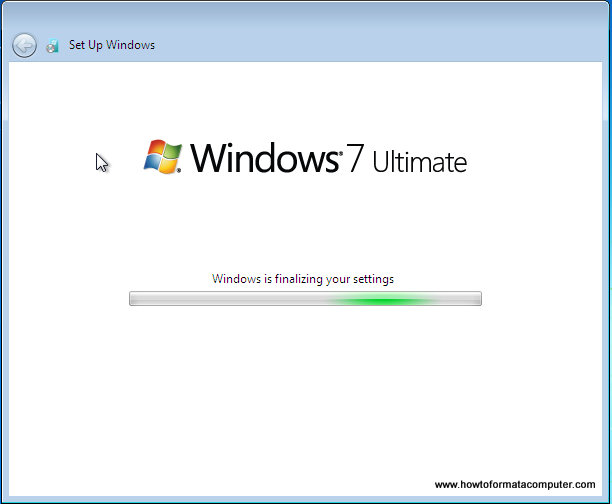
Install Windows 7 - Windows is finalizing your settings
Can you see the finish line ? Yup, we’re there
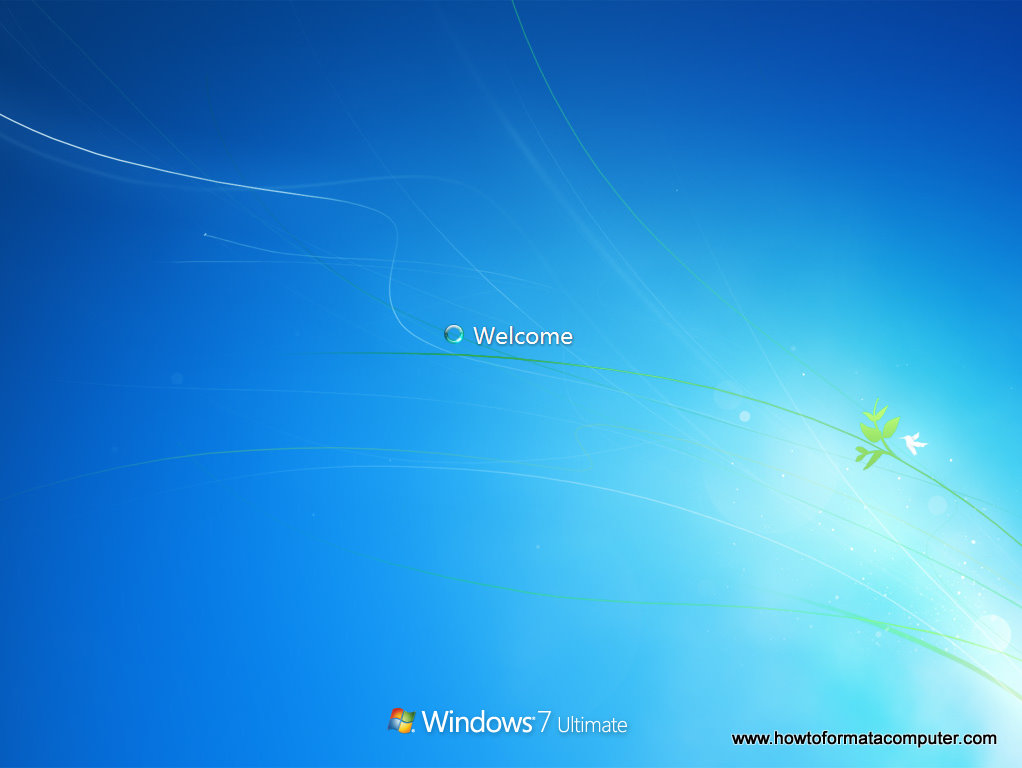
Install Windows 7 - Welcome screen
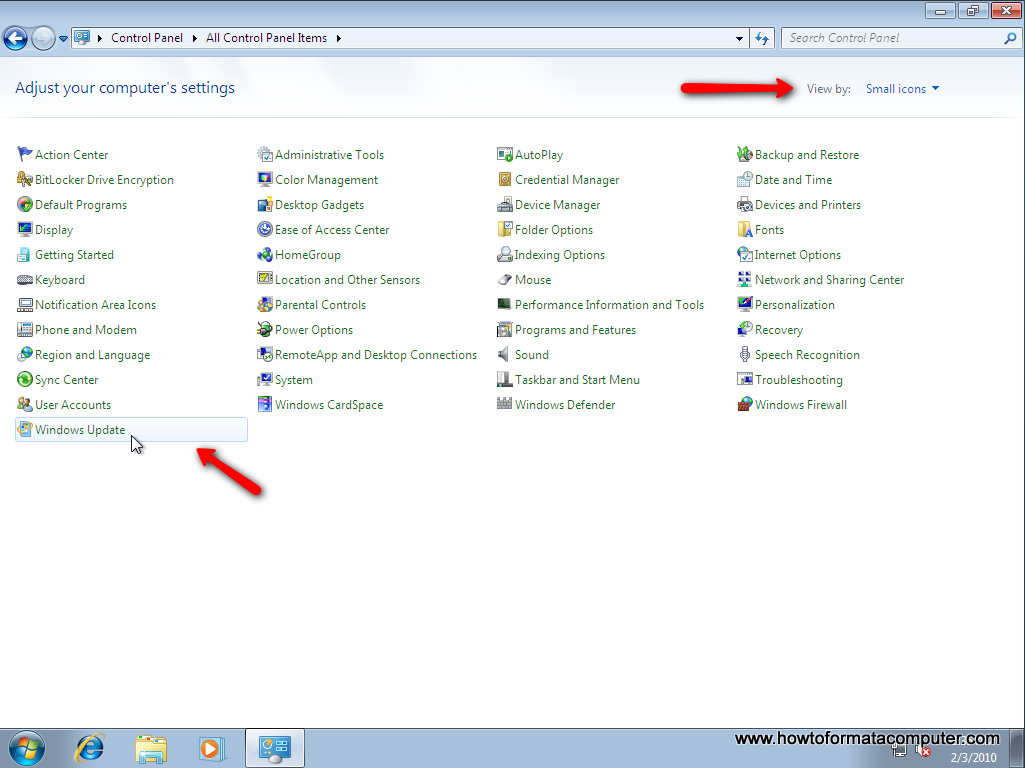
That’s it. Now insert your computer manufacturer drivers CD and install drivers. Also FYI, Windows 7 has great driver support, go to Start –> Control Panel –> Select View By = Small Icons –> Click Windows Update
Install Windows 7 - Windows Update
Check for updates and click on optional updates, to see which drivers windows 7 found for your computer automatically.